5 Steps to set up your amazing Shopify store within 20 minutes
Shopify
You want to start an e-commerce business right now or you just like to see how the best Shopify stores are? Alright! No matter what you are going to do, building a store from scratch is not as hard as you thought.
Follow up on our tutorial below and your Shopify store will be ready to collect money for you!
How to set up Shopify store?
1. Sign up for an account
The first step is also the easiest. You have to sign up for an account to use Shopify.
Start your Shopify 14-day trial with FireApps
Did you know Shopify is now accounting for 20% of the e-commerce business.
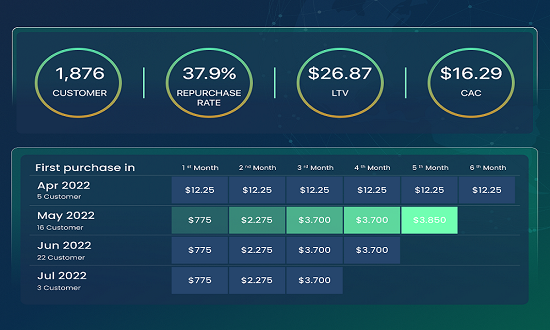
Over 2200 merchants open their Shopify store everyday and 50% of them have a repeat purchase. Join them today!


Go to the website, then click “Start free trial. You will be asked to fill the information like email, password, and your desired store name.
After that, Shopify will ask you about your e-commerce business plan, how big your scale will be, and what kind of your store will be (online store or brick and mortar store?)
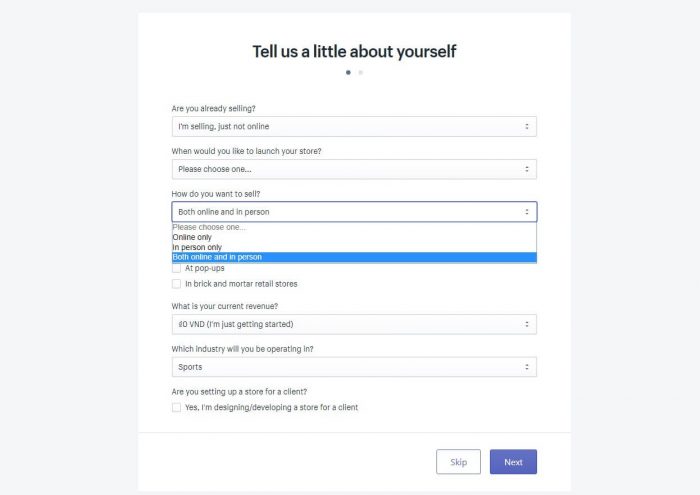
For this tutorial, we will make an online store so you should check the box with “online content” to follow up.
You will then need to fill in personal information such as your name, address, etc. which is allowed Shopify sets your currency and taxes.
2. Add your products
At this stage you will see your admin page first. If you are familiar with a blog platform, you will see your store backend site is almost the same as your blog.
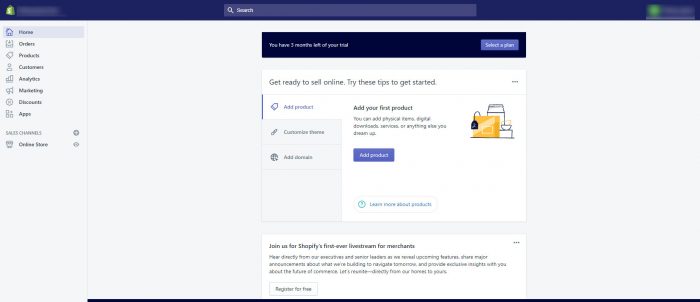
Just click “Add product” in the center of the screen. You will see it.
The following site looks like a blog session in a blog platform that allows you to fill in details like a title, description, price, stock quantity, etc.
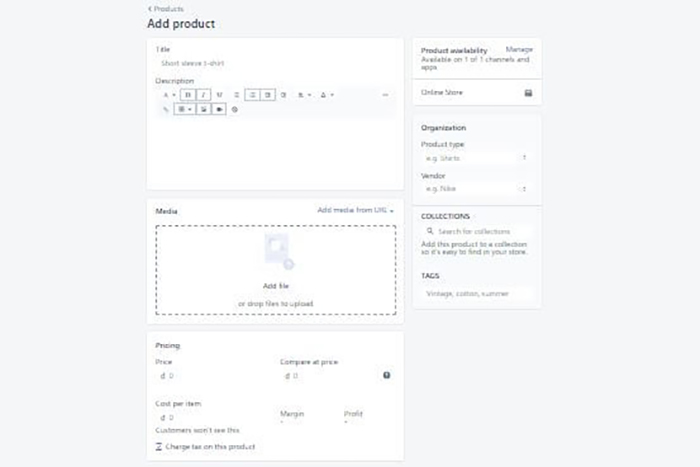
The most important of your product content is its image. Make sure to choose the proper images that will attract your target audience but don’t use the false ones. It will make your business a fraud in the customer’s eyes.

With Shopify, you can create a collection that contains a group of products. For example, you are selling outdoor sport stuff, you can make collections like sport clothing, camps, and camping gear.
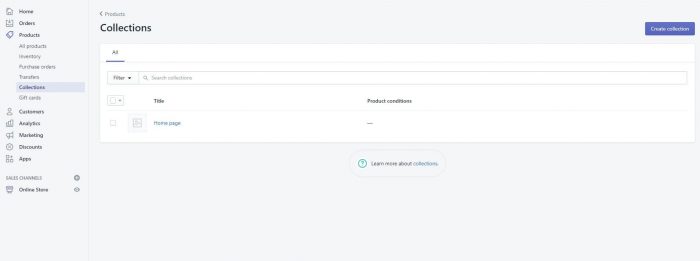
And one product can be set in more than one collection. That setting will increase the appearance chance of your product and might get your store’s structure better.
Once the collection is created, you can always edit it, such as add or remove products, descriptions, and so on.
3. Customize your store’s look
Back to the dashboard page, you can do it by clicking the “Home” button on the left menu.
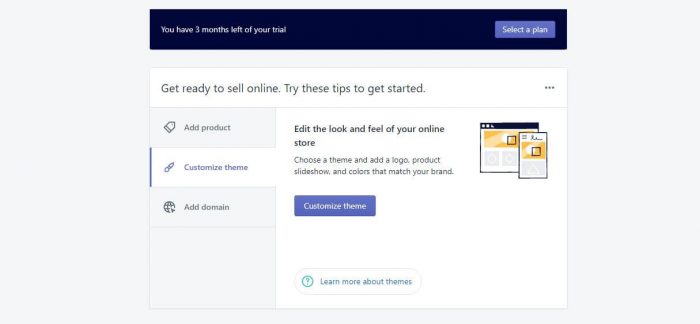
Then, you will see below tab “Add product”, there will be a “Customize theme” tab, go for it and you are ready to set the look of your site.
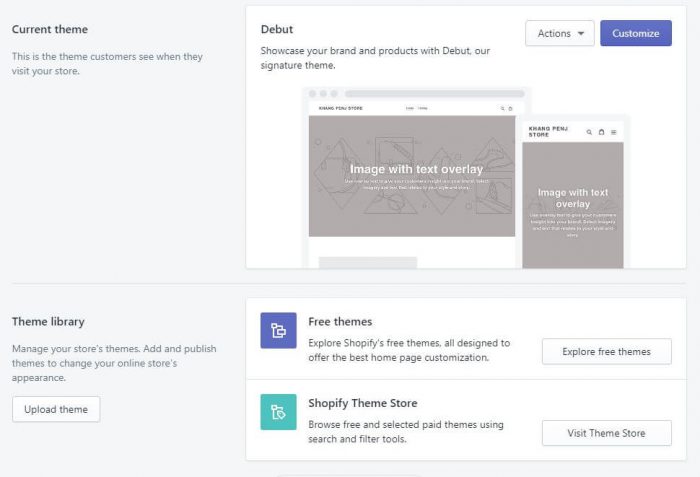
Customize current theme
In the upper tab Current theme, you can edit and arrange all elements of your site based on the current theme. It is quite complicated for the fresh new.
The page now has two parts. The left column is the settings tab while the right area is the live preview for a particular selected section. On the top bar, you can change your preview style according to the audience device.
In your Sections column, which allows you to see the order of elements. Drag any section up or down to change its position on your page. Click any section to change its settings. At the end of the section column, you have the “Add section” button. Click to add what you need for your site.
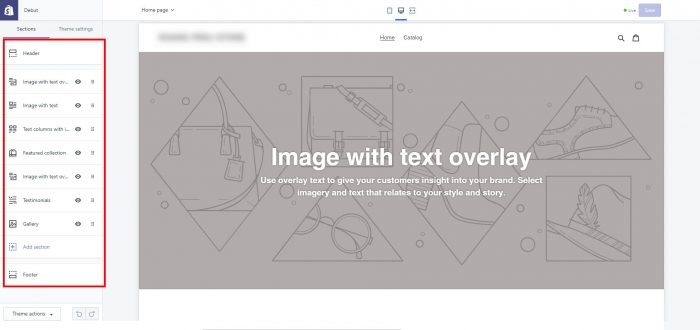
Switch to Theme settings column, you will control general appearance like colors, typography, checkout page, etc.
Theme library
If your current theme didn’t meet your needs, you have to find a new theme. This tab will have you selected a new theme.
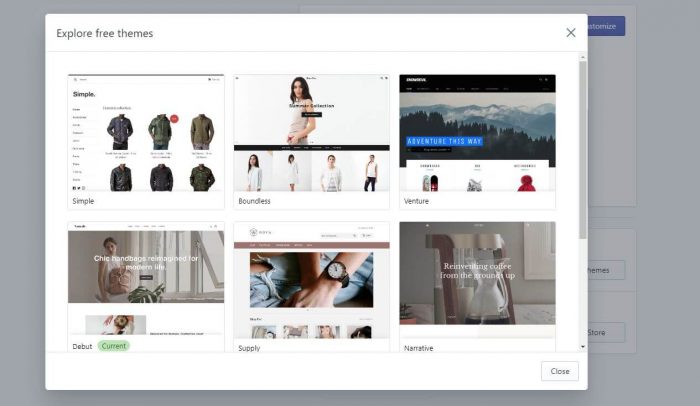
There are free themes and paid themes. The free themes are great but the paid ones will exceed that greatness. They give you even more space to customize the appearance. Sometimes you will have to know HTML/CSS to work with those themes.
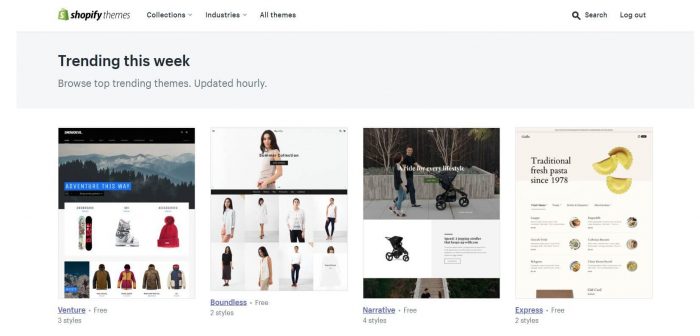
However, Shopify has its community called Shopify Experts where you can look for help anytime.
If you want your Shopify store to look better, we recommend you to visit the best Shopify stores to see how they did.
4. Set up your domain
To the main dashboard, click the “Add domain” to set your site’s domain. You can follow Shopify instructions to buy your new domain or you can buy it elsewhere and add it to your Shopify store.
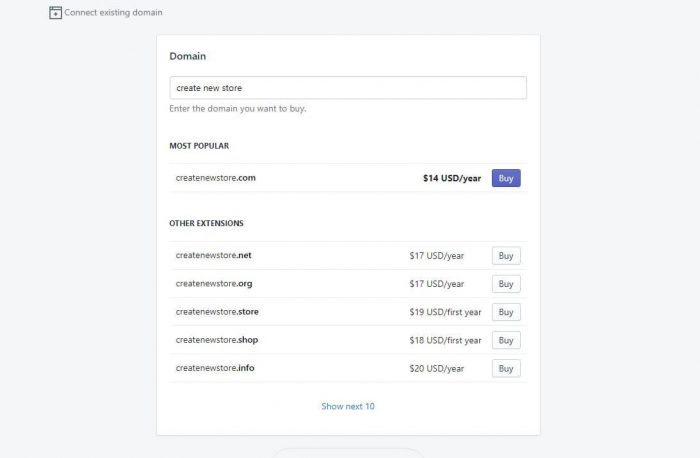
Once you purchase a domain from Shopify, the new name will be added directly to your store.
Upon activation, you can type a new domain, and then you’ll see your Shopify store.
5. Activate payment processor
You will find the Payment settings in the Setting button on the left bottom corner. In this section, you will select your preferred payment processor to be used in your Shopify store.
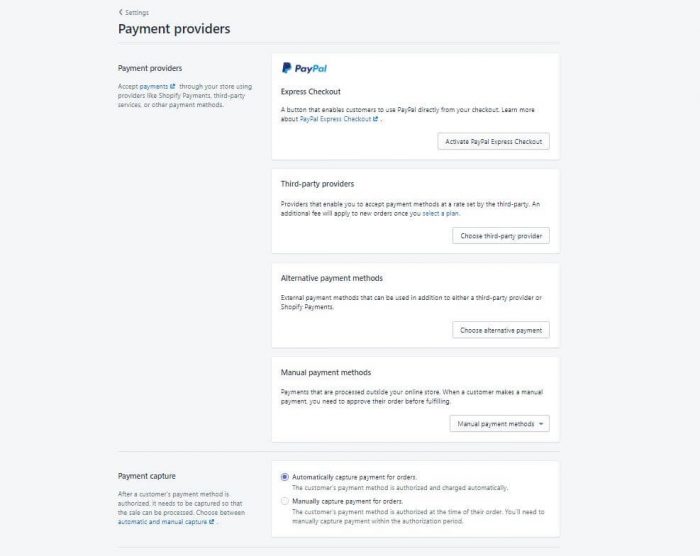
Congratulation! You have your Shopify store completely set!
After this step, you are all set. You now have a fully functional Shopify store.
However, your site still very basic for now. The journey of e-commerce has just begun and you have a lot of things to do to set up your best Shopify store as well.
Keep learning from the bests and one day your store will be among the best Shopify store.
Launch your Shopify store now! https://www.shopify.com/
Want to know more about Shopify, why don’t check this article “6 Things you shouldn’t miss out about Shopify before launching an e-commerce store”




Leave a Reply