How to set up and manage Shopify change currency stores with Transcy?
Shopify
Online shopping has grown in popularity over the last few years. As an owner e-commerce store, you are looking to expand your business into new markets, then supporting Shopify change currency can boost your revenues significantly.
In this article, Transcy from FireApps will guide you through how to set up and switch currencies for your Shopify stores.
When you first install and access the app, there will be some brief instructions on how to set up the currency.
How to set-up currencies?
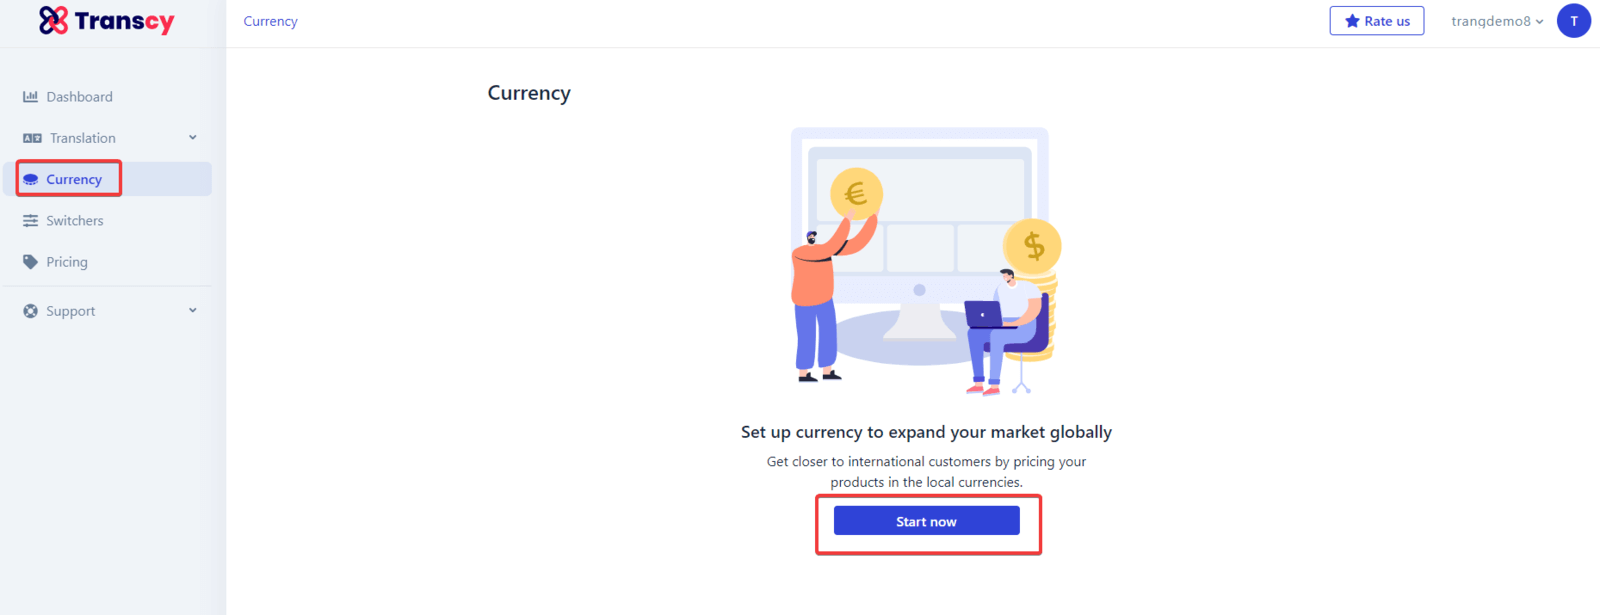
The first step is to press the button “Start now” to configure your store currency’ format:
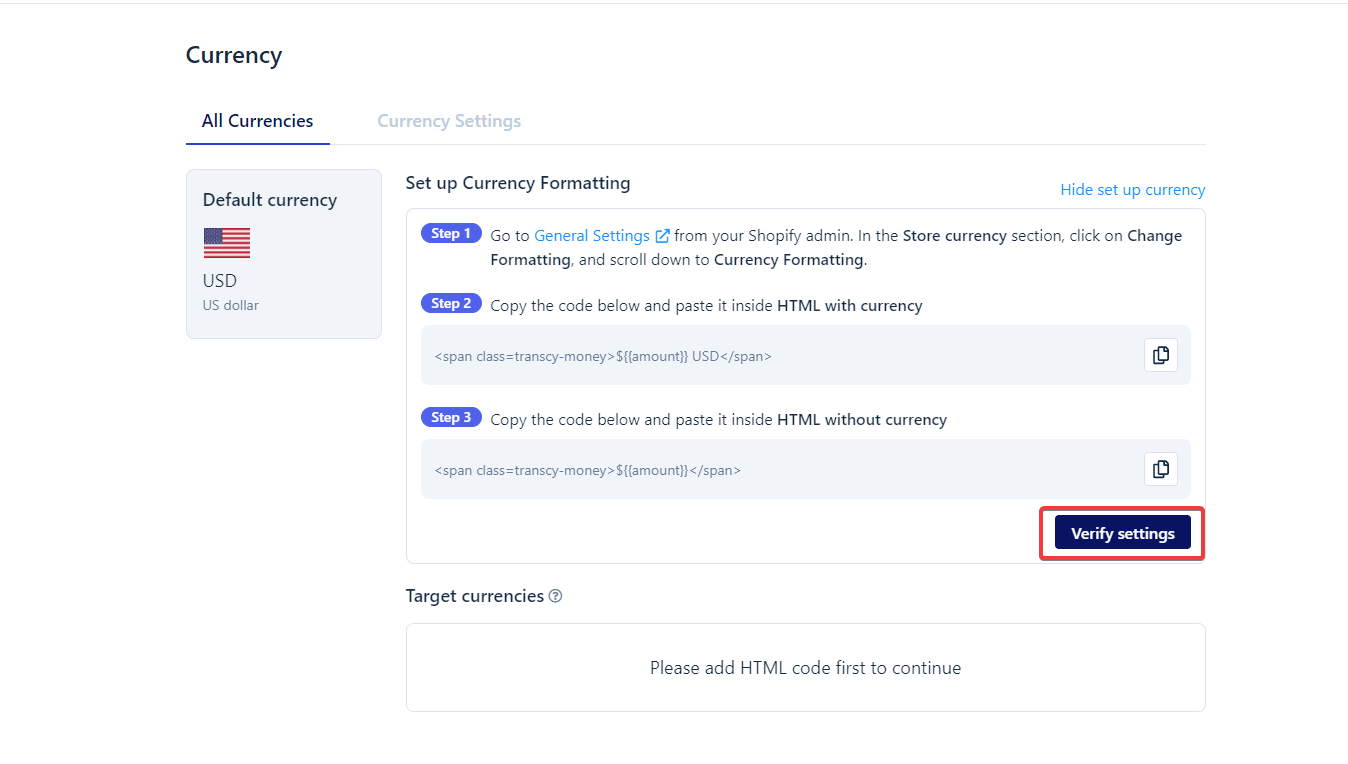
Second, you will see a tour guide open, similar to the one below, which will walk you through each step in detail:
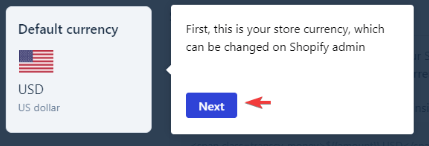


The steps below are just an example flow for configuring currency format. Because the code may differ depending on the theme, simply follow the instructions in the app to set up the correct code.
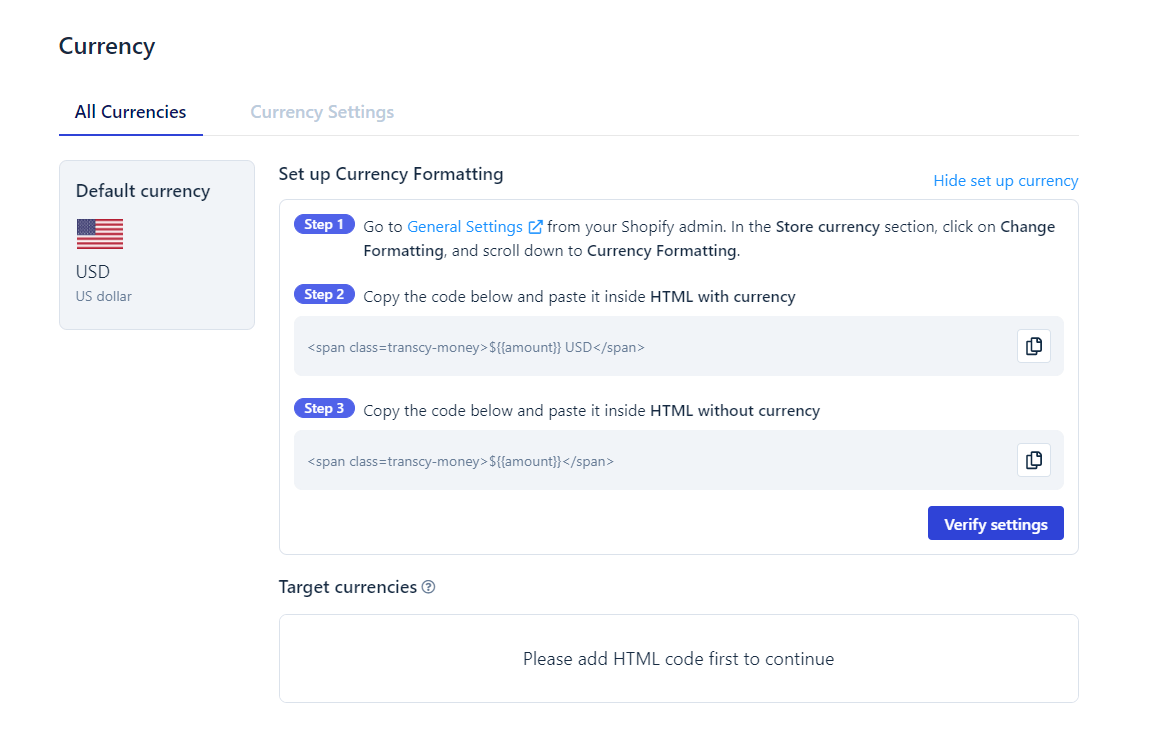
- Go to General Setting in Shopify admin
- Go to Store Currency settings > click on Change formatting
- Replace the current code in HTML with currency section with the following code (this code is just an example and it will be different depending on specific themes so please follow the instruction in the app): <span class=transcy-money>${{amount}} USD</span>
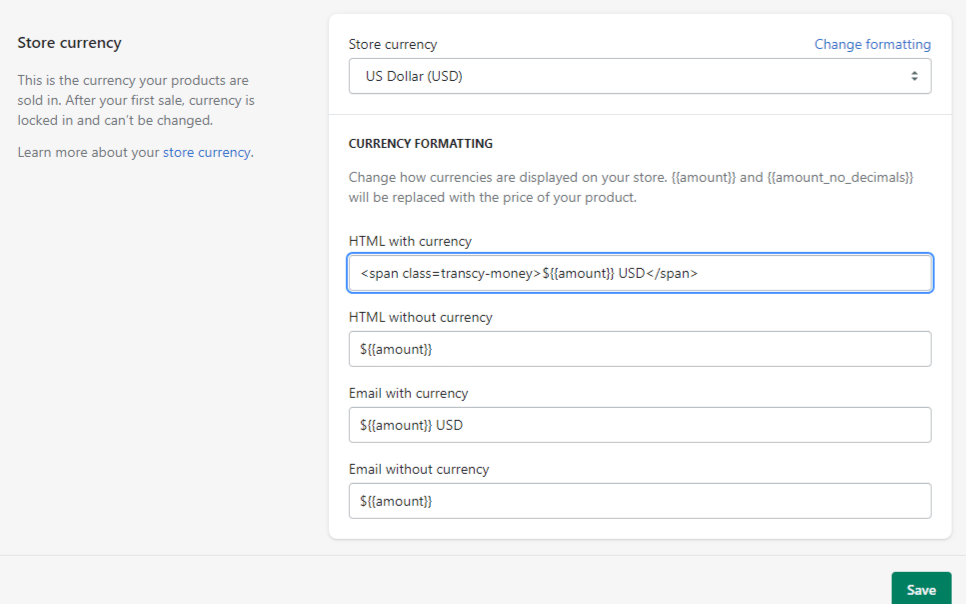
- Replace the current code in HTML without currency section with the following code <span class=transcy-money>${{amount}}</span>
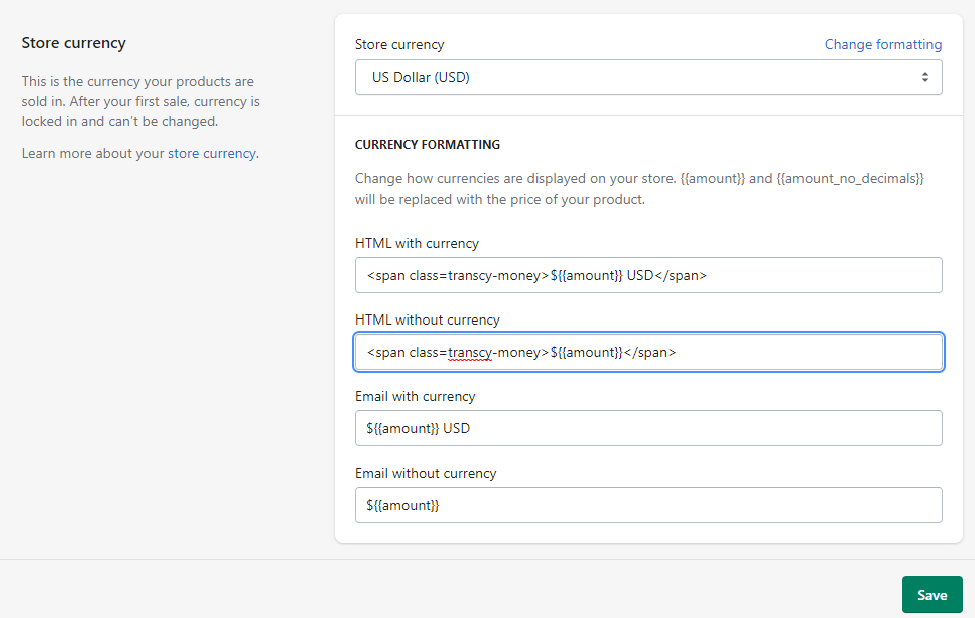
- Save your settings
- After that, get back to the app and click on Verify settings
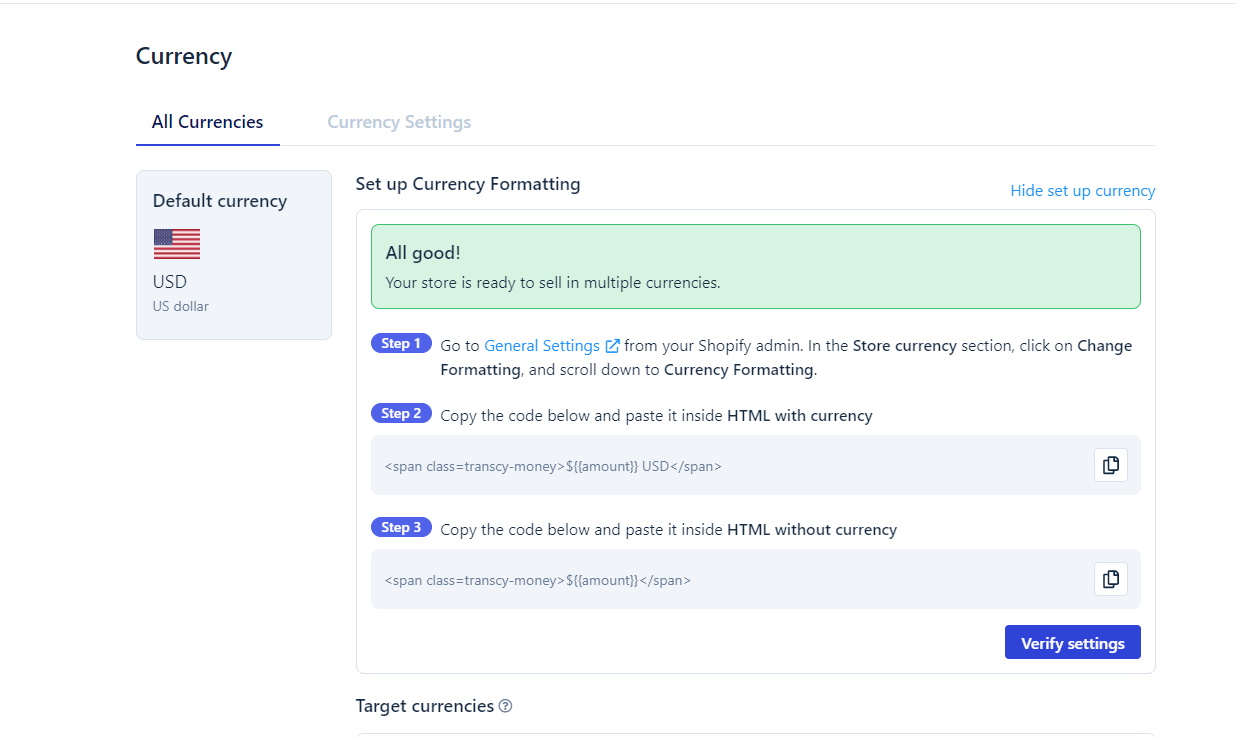
- When everything is complete, you will see a message similar to the one below
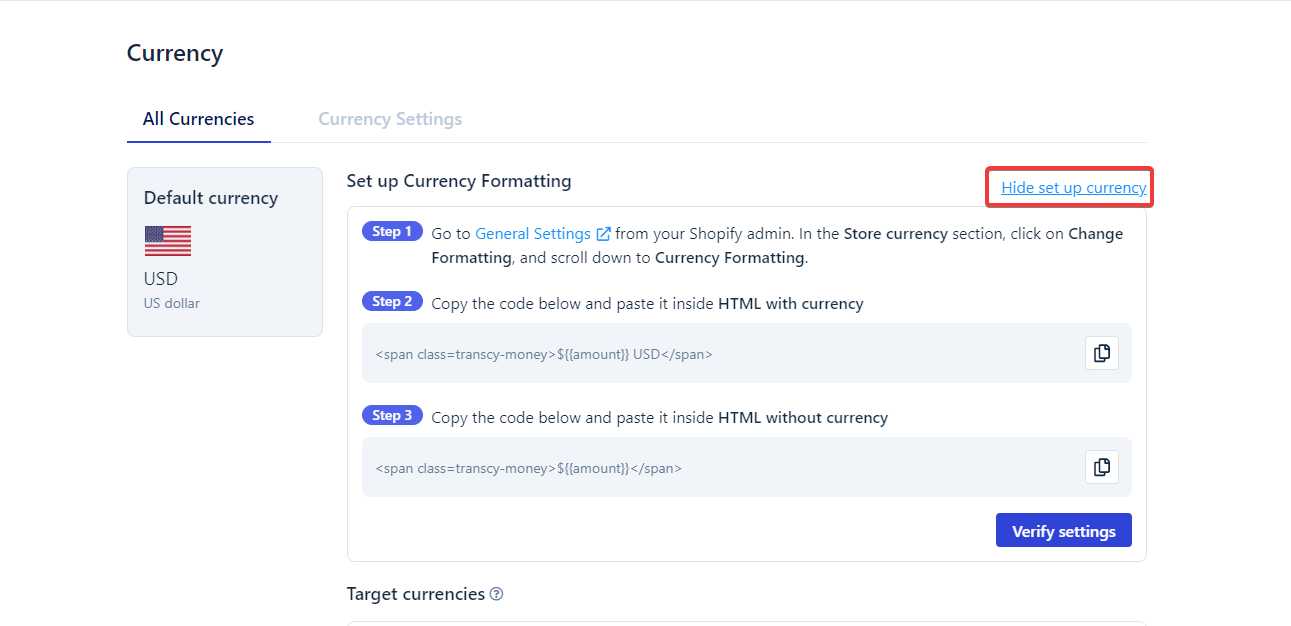
After setting Currency code successfully, you can click on Hide set up Currency to hide the Set up Currency formatting guide if you want.
NOTE:
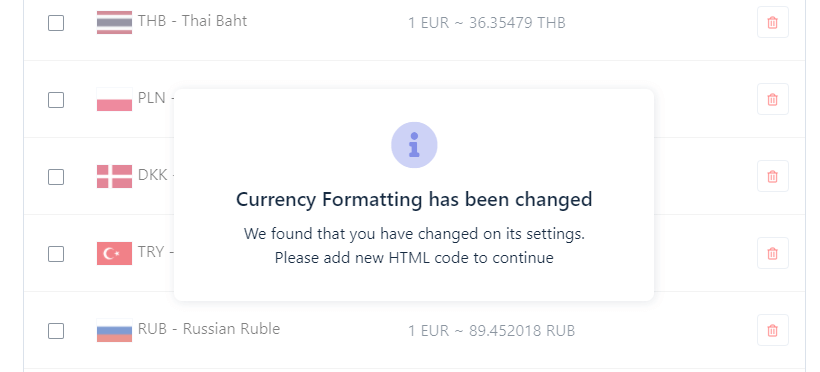
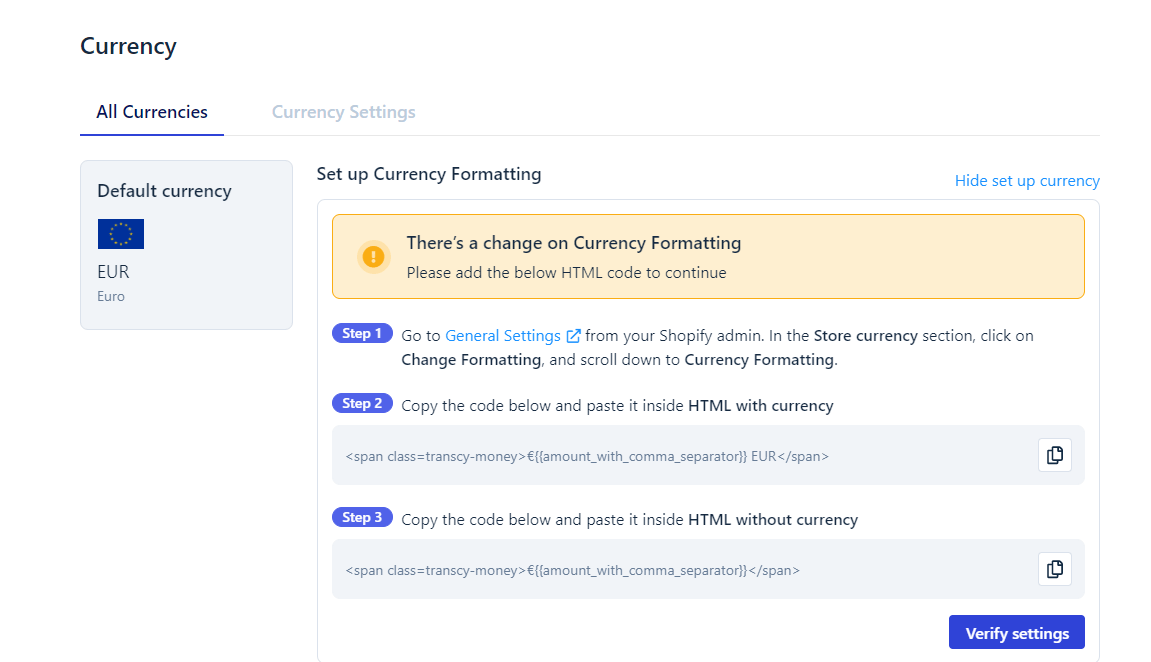
If you change your default currency in Shopify, the Set up currency formatting guide will appear in the app, and you will need to enter a new Currency code in accordance with the guide.
For example:
I change the default currency from USD to EUR in Shopify, then I will see this notification popup in the app to set up the Currency code again.
How to manage currencies?
When you’re finished configuring, a Currency settings menu will appear. You can now manage (Add/Edit/Delete) and customize how your currency appears in your Switcher.
Add Target Currency
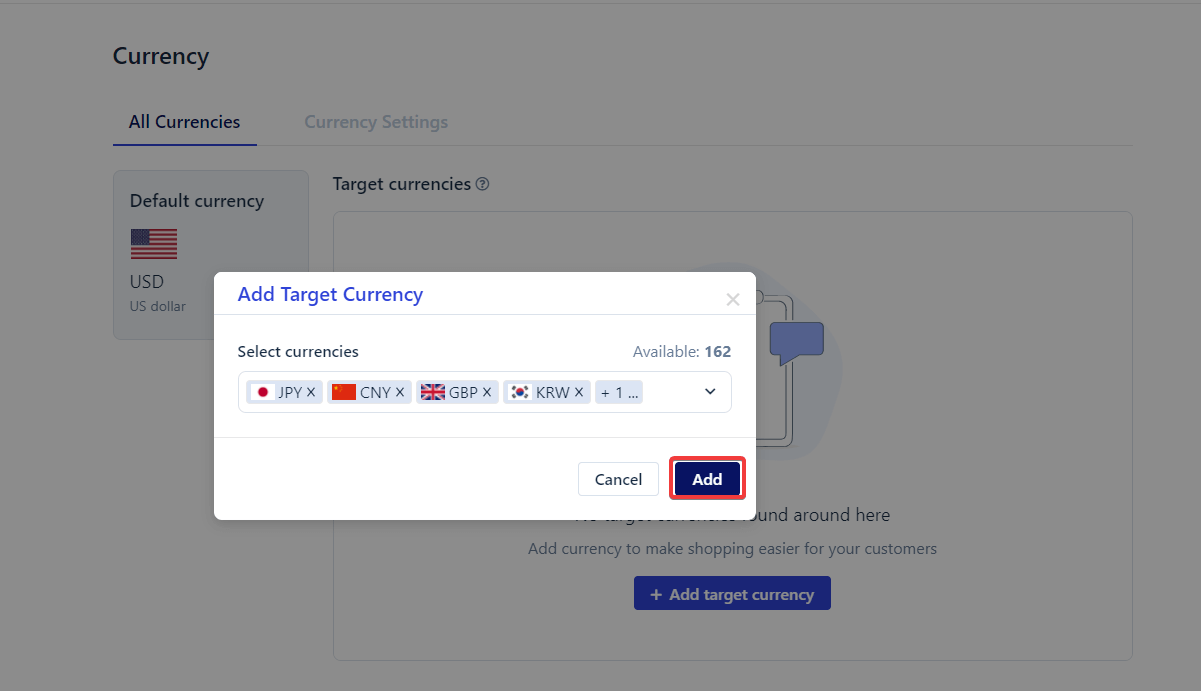
- Click on Add Target Currency
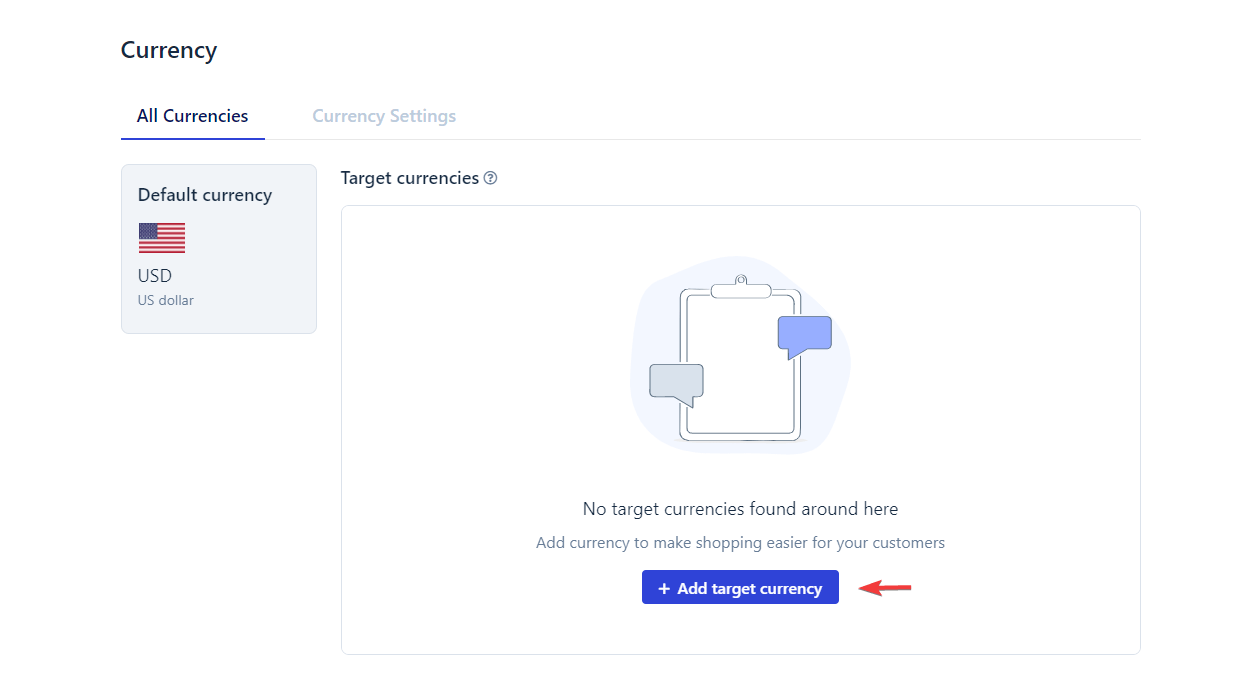
- Choose your target currency from our list of 167 supported currencies.
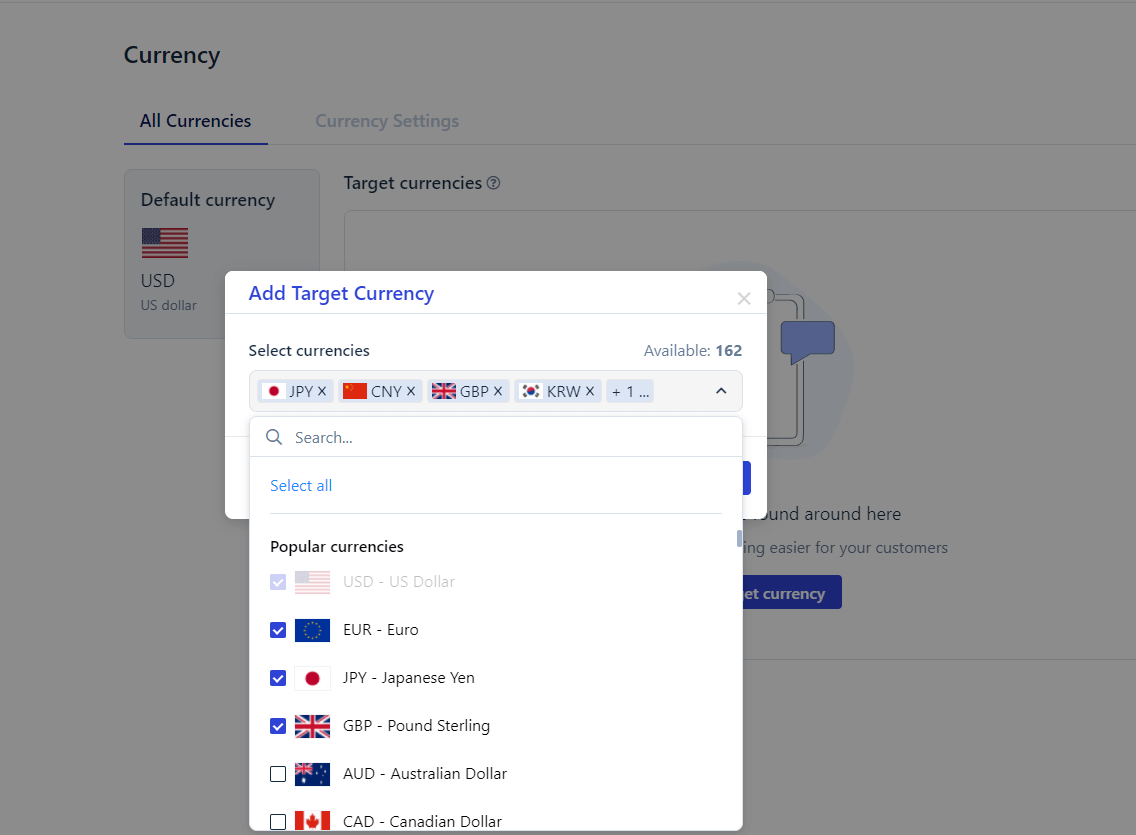
- Click on Add
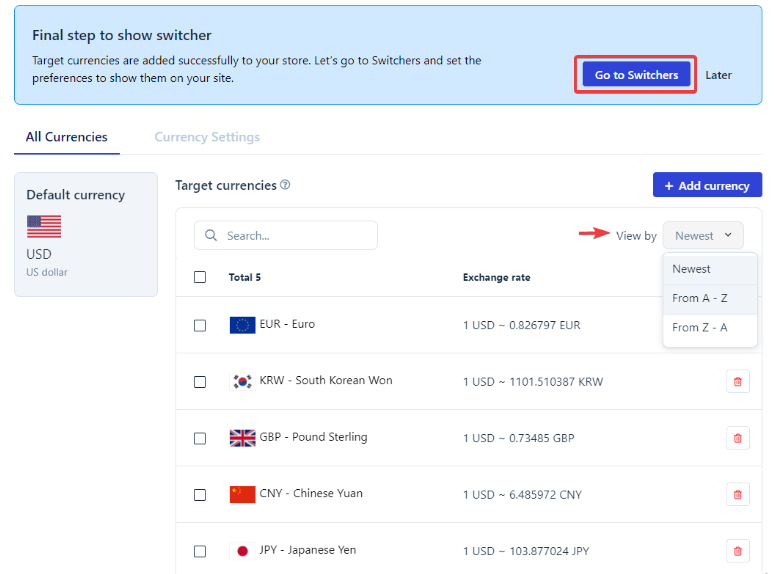
- After that, it will display a notification similar to this one, prompting you to Go to Switcher settings to customize your switcher.
You could choose View by to sort the order of currencies in the Target currency list and Switcher as your favorite.
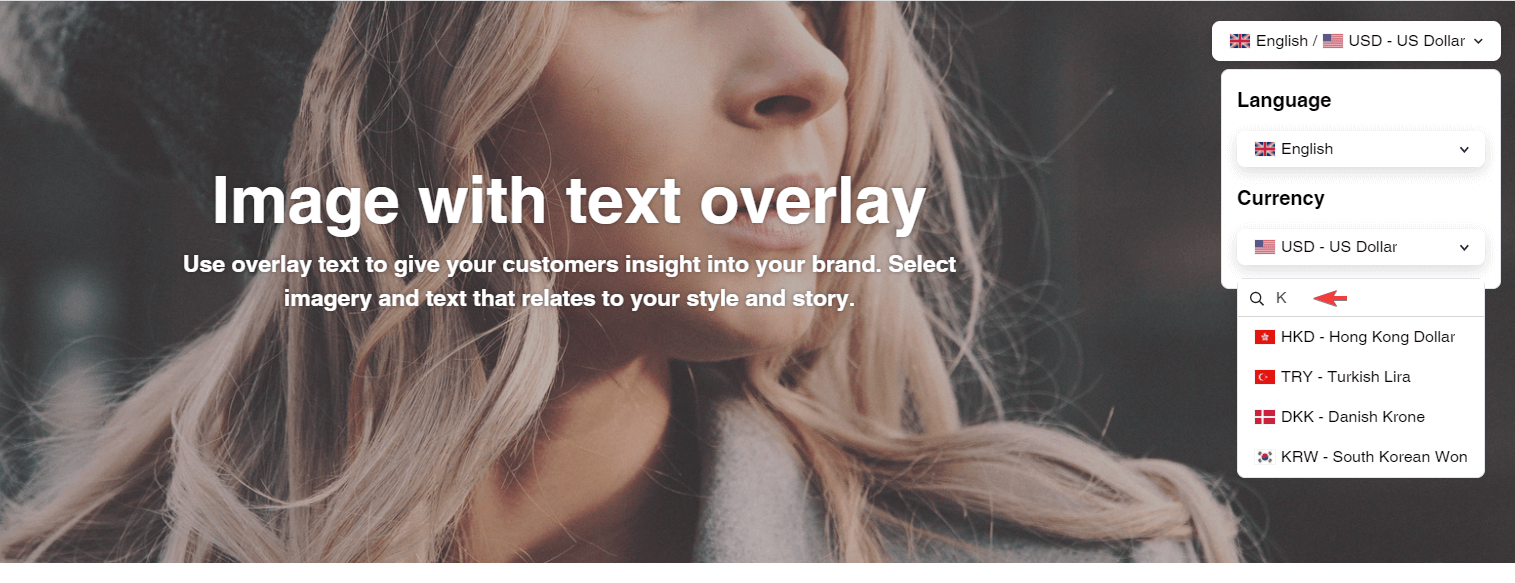
- You can view your page to see the result, as well as scroll down or search for any of your target currencies on the Switcher, as shown below. This also makes it easier and faster for your customer to find and select their local currency.

This is a comprehensive guide for setting up and managing currencies in Shopify stores using Transcy.
Transcy - The ideal localization solution for all size businesses
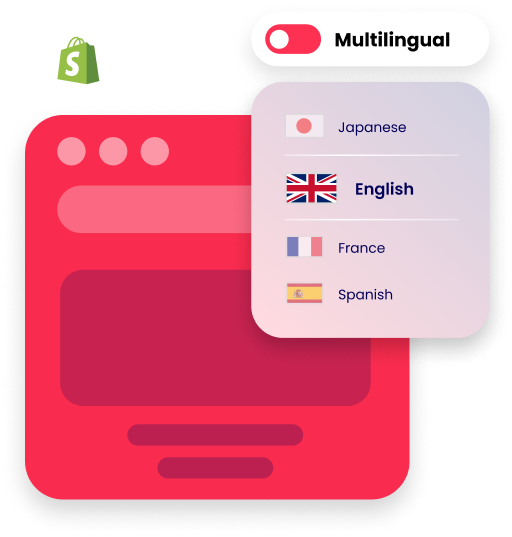
Transcy is the most efficient way to assist you in multilingually translating your whole Shopify store content and converting your local currencies in order to provide localized experiences, increase sales, and scale globally.
Conclusion
Shopping online is becoming increasingly popular. If you want to capitalize on this trend, you must be prepared to meet the needs of your customers.
To convert target currencies is a must. That’s why we wrote this article to guide you with Shopify change currency and giving your customers the option to shop in their home currency improves their shopping experience.
Transcy - The ideal localization solution for all size businesses
Transcy is the most efficient way to assist you in multilingually translating your whole Shopify store content and converting your local currencies in order to provide localized experiences, increase sales, and scale globally.




Leave a Reply